Transitioning from classic lashing to volume is one of the most exciting—and intimidating—milestones for any artist. Suddenly, you aren't just placing one extension; you’re creating a tiny piece of architecture.
Among the various techniques used by pros, the "Pinch Method" remains the industry favorite for creating a snatchy, slim base and a perfect wide fan. If you’ve been struggling with fans that fall apart or bases that look like blocks, don't put down your tweezers just yet.
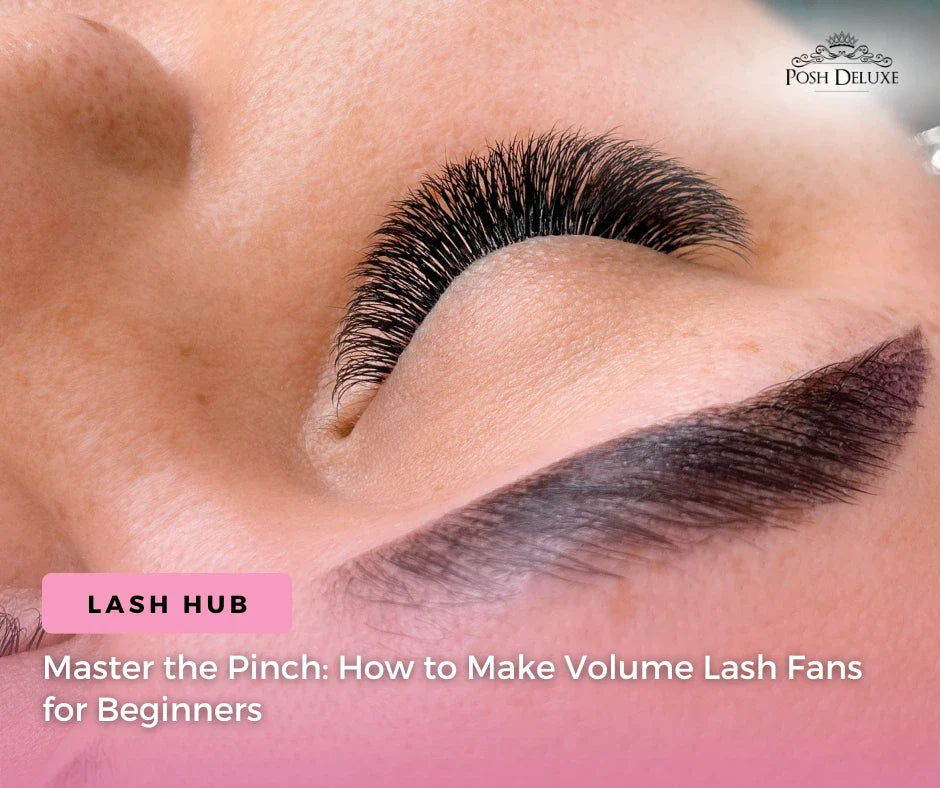
Here is our professional breakdown of how to make volume lash fans for beginners using the iconic pinch method.
The Anatomy of a Perfect Fan: The 2mm "Sweet Spot"
Before you even touch your tweezers, you need to understand what you’re aiming for. A perfect volume fan isn't just about the width at the top; it’s all about the base.
The secret to professional-grade fans is the 2mm sweet spot. This is the bottom 2mm of the fan where all the individual lashes must meet into a singular, sharp point.
- If the base is too long: The fan will be too heavy and could droop.
- If the base is too short: The lashes won't have enough surface area to wrap around the natural lash, leading to poor retention.
Finding this balance is the difference between a set that looks "clumpy" and one that looks like a seamless, fluttery cloud.
Handmade Lash Fans vs Premade Fans
Many beginners ask whether they should practice with handmade lash fans vs premade options.
Both have their place in professional lash artistry.
Handmade Fans
Best for artists who want:
-
Complete control over fan size
-
Custom density for each client
-
Better weight distribution
Premade Fans
Helpful for:
-
Faster application times
-
Beginner practice
-
High-volume appointment days
Learning how to make volume lash fans for beginners is still an essential skill, even if you occasionally use premade fans.
Handmade fans allow you to customise every set.
The Pinch Method: Step-by-Step
Ready to try? Grab your favorite volume tweezers and a strip of 0.05 or 0.07 lashes, and follow these steps:
- The Pickup: Using your volume tweezers, grab a small bundle of lashes (2D–6D). Pull them toward you or slightly upward to remove them from the strip.
- The Placement: Lower the bundle into the "pinch" of your non-dominant hand (usually between your thumb and index finger). Hold the lashes near the base, but do not let go with your tweezers yet.
- The Roll: This is the magic move. Gently roll your thumb and index finger in opposite directions while slightly loosening the tension of your tweezers. You will see the tops of the lashes bloom outward into a fan.
- The Lock: Once the fan is symmetrical, re-apply pressure with your tweezers to "lock" the shape.
- The Dip: Dip the very tip of the base into your adhesive. The surface tension of the glue will help pull that base into a razor-sharp point.
- Place on the Natural Lash : After dipping, place the fan directly onto the natural lash, ensuring the base sits cleanly against the lash. When done correctly, the fan will stay open and balanced.
Why Quality Matters: Posh Deluxe Russian Volume Lashes
To truly master how to make volume lash fans for beginners, you cannot overlook the quality of your extensions. At Posh Deluxe, our Russian volume eyelash extensions are curated by lash artists for lash artists.
We follow a strict inspection procedure to ensure every tray has a precise and alluring curl. Whether your client wants a bold, dramatic look or soft, everyday elegance, our volume extensions provide the versatility and retention you need to build a loyal clientele.
Common Pitfalls (And How to Fix Them)
Even for seasoned pros, the pinch method can be finicky. Here are a few beginner lash artist tips for troubleshooting your fans:
- The "Square Base": If your base looks flat or wide instead of pointed, you are likely applying too much pressure with your fingers. Relax your pinch! The fingers should only guide the lashes, not crush them. A square base happens when the lashes don’t meet at a tight point.
- The "Crossed Lash": If lashes are crossing over each other at the base, your tweezer tension is likely uneven. Ensure your tweezers are grabbing the bundle perfectly horizontally .Crossed lashes occur when individual fibers overlap unevenly.
- Fans Closing: If your fan "pops" shut the moment you let go, you might be using too much adhesive. Only a tiny micro-drop is needed to bond the base. Sometimes a perfect fan collapses after dipping into adhesive.
Practice Makes Permanent: Practice Tips for Beginner Lash Artists
If you’re just learning how to make volume lash fans for beginners, consistency is key.
Some helpful beginner lash artist tips include:
-
Practice with smaller fans first (2D–3D)
-
Use high-quality volume lashes with flexible bases
-
Work slowly until your muscle memory develops
-
Practice on a mannequin or sponge
Over time, the volume lash pinching method will start to feel natural.
Like any skill in the beauty industry, repetition builds confidence as the pinch method is a muscle-memory skill. Don't be discouraged if your first fifty fans end up in the bin—every master artist started exactly where you are. Use high-quality, "easy-fan" or standard volume lashes from Posh Deluxe to ensure your materials aren't fighting against you as you learn.
At Posh Deluxe Lash Supply, we support lash artists at every stage of their journey with professional tools and education designed to help you refine your craft.
With patience and practice, creating beautiful handmade fans will soon become second nature.
Ready to level up your kit?
Shop our professional Volume Tweezer Collection and Premium Russian and Volume Lashes at Posh Deluxe today!


