

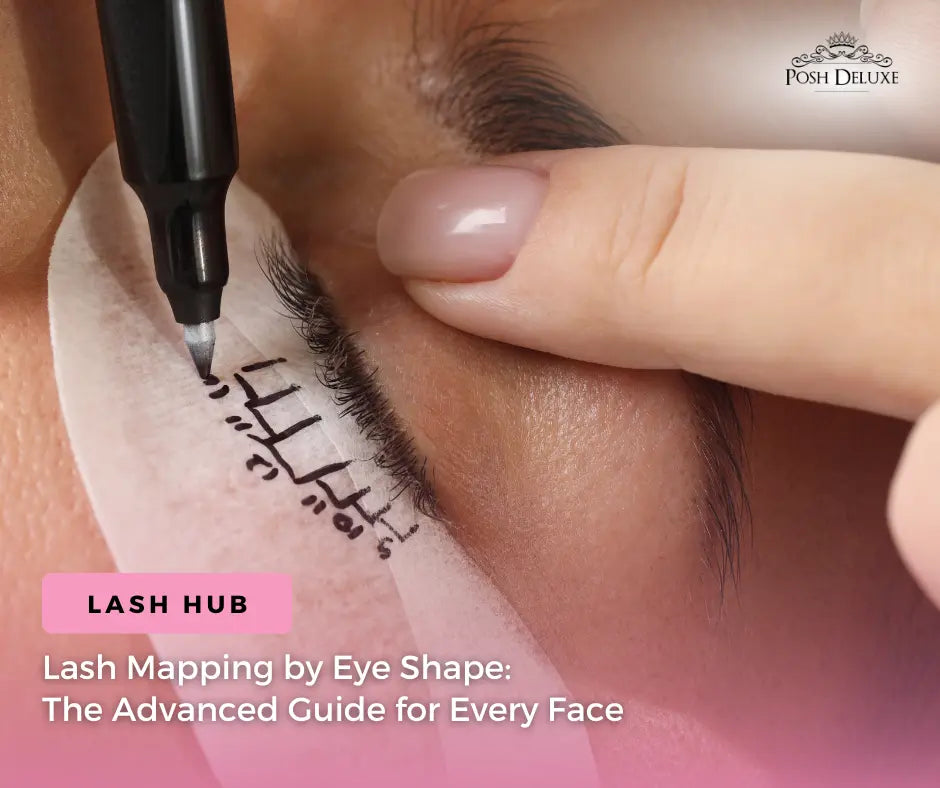
There is no such thing as a universal lash map. The generic "1-2-3-2-1" formula every beginner learns is a starting template, not a finished skill. Real clients have real face proportions, real eye shapes, and real natural lash growth patterns — and applying the same map to every set is why so many lash technicians deliver sets that look technically fine but never quite flatter the client.
This guide covers the eight main eye shapes Australian lash artists work with, the specific mapping strategy that flatters each, and the common mapping mistakes that make otherwise-beautiful lash work look mediocre. Written for intermediate to advanced lash artists who want to move past the standard textbook maps and start delivering sets that actually enhance every client's unique features.
Prerequisite reading: If you haven't yet, start with our foundational How to Do Lash Mapping — Step-by-Step Guide for Lash Artists. This advanced guide assumes you already understand the basics of mapping.
The Four Universal Mapping Principles
Before jumping into eye shapes, there are four mapping rules that apply to every client regardless of eye shape. Get these right first.
- Always work with the natural lash length. As a general guideline, extensions are usually 2–3 mm longer than the client's natural lashes, although this should always be adjusted based on lash health and styling goals. Measure before you map.
- Follow the natural lash growth direction. If a client's outer corner lashes grow downward, mapping upward-lifted D-curl there will fight the natural direction and reduce retention.
- The shortest lashes go at the inner corner. This is a universal rule — inner corner lashes are naturally the shortest, and extensions should follow that.
- Vary lengths and curls across the lash line. Uniform mapping can look less natural on many clients because natural lashes vary in direction, density, and length. Real lashes vary, so extensions should too.
How to Identify Your Client's Eye Shape
During your consultation, look at your client's eyes with a neutral, direct-forward gaze. Ask five quick assessment questions:
- Is the outer corner higher, level, or lower than the inner corner? Higher = almond or upturned. Level = round or wide-set. Lower = downturned.
- Is there a visible crease above the lash line? Yes = standard eye. Partially covered = hooded. No crease = monolid.
- Do the eyes sit deep in the socket? Yes = deep-set. No = normal or protruding.
- How far apart are the eyes relative to their width? Space greater than one eye width = wide-set. Less than one eye width = close-set.
- Do both eyes match perfectly? Slight asymmetry is common — map each eye individually if the shapes differ significantly. Eye shape should always be assessed with the client sitting upright before lying down for treatment.
Almond Eyes — The Standard Template
Almond eyes are the most universally flattering shape and the easiest to map because standard mapping principles work directly. The outer corner sits slightly higher than the inner corner, the eye tapers gracefully at both ends, and the crease is clearly defined above the lash line.
Almond mapping strategy
- Curl: C or CC as the primary curl, with D at the outer third for a cat-eye lift.
- Length distribution: 7-8 mm at the inner corner, 10-11 mm through the middle, 12-13 mm at the outer corner.
- Diameter: Anything appropriate for their natural lash strength — the shape supports a wide range of styling options
- Style effect: A soft cat-eye that flatters without needing to correct anything.
Round Eyes — Elongate the Outer Corner
Round eyes appear more circular than almond-shaped, with the outer corner sitting at roughly the same level as the inner corner. The goal with mapping is to visually elongate the eye horizontally to move it closer to the almond ideal.
Round eyes mapping strategy
- Curl: C through the middle, strong D or L at the outer corner for lift and elongation.
- Length distribution: Place the longest lengths toward the outer third while remaining appropriate for the client's natural lashes. The outer length is deliberately dramatic.
- Style effect: Creates the illusion of a lifted, elongated almond shape or cat eye effect.
- Avoid: Uniform lengths across the lash line — this makes round eyes look even more round.
Hooded Eyes — Lift Above the Lid
Hooded eyes have an eyelid fold that partially covers the visible lash line when the eye is open. This is Australia's second-most common eye shape after almond, and it's the shape most damaged by generic mapping. The mistake is using standard D or CC curl through the middle — the curl disappears under the hood.
Hooded eyes mapping strategy
- Curl: L or M curl through the middle and outer third — the flatter base clears the hooded lid. In many cases, L or M curl performs better than D curl because the flatter base helps lift lashes above the hooded lid in the covered zone.
- Length distribution: Shorter than you'd expect — 7-9 mm at inner, 9-11 mm middle, 11-12 mm outer. Extreme lengths through the middle get lost under the lid.
- Diameter: Fine to medium (0.05-0.07) — heavier lashes look weighed down.
- Style effect: Visible lashes that flatter the eye without disappearing under the hood.
Read more: What Are L Curl Lash Extensions? A Professional Guide, and Eyes Wide Open: Using Lash Extensions to Combat Hooded or Small Lids.
Monolid Eyes — Flat Lift, Fine Density
Monolid eyes have no visible crease above the lash line — the lid is smooth from lash to brow. Most common in East Asian clients but present across many ethnicities. The mapping goal is to create dimension where there's no natural crease-shadow to work with.
Monolid mapping strategy
- Curl: L or M through the middle for visible lift; CC or C at the inner corner for softness.
- Length distribution: 7 mm inner, 10 mm middle, 12 mm outer. Kept relatively shorter than for other shapes.
- Diameter: 0.05 or 0.07 volume — density gives dimension the shape naturally has.
- Style effect: A soft dimensional lift that makes the eye look wider and more awake.
- Avoid: Heavy classic sets in 0.10 or thicker — the weight pulls the flat lid down.
Downturned Eyes — Strong Outer Lift
Downturned eyes have an outer corner that sits noticeably lower than the inner corner. The mapping goal is unmistakable: lift the outer corner visually to correct the downward angle and create a more open, awake look.
Downturned eyes mapping strategy
- Curl: C or CC at the inner corner and middle, D curl—or L curl where appropriate. The strong lift at the outer edge does the correcting work.
- Length distribution: 8 mm inner, 10-11 mm middle, 13-14 mm outer with a dramatic outer taper.
- Style effect: A pronounced cat-eye that lifts the visual line of the eye.
- Avoid: Uniform lengths, symmetrical L mapping, or long lengths through the middle. Do not lash a few lashes on the outer corner to prevent drooping, sad lashes.
Deep-Set Eyes — Bring the Lash Line Forward
Deep-set eyes sit further back in the socket than average, with a prominent brow bone. The lash line looks recessed, and standard lengths can disappear into the shadow of the socket. The mapping goal is to bring the lashes visually forward.
Deep-set eyes mapping strategy
- Curl: D curl or a curl that helps project the lashes forward without overwhelming the eye.
- Length distribution: Uniform medium lengths 9-11 mm across most of the eye, with slight outer emphasis. The consistent length brings the whole lash line into view.
- Diameter: Medium (0.07) or full volume — the density adds dimensional presence.
- Style effect: Lashes that visually project the eye forward and out of the shadow.
Wide-Set Eyes — Pull the Focus Inward
Wide-set eyes are more than one eye-width apart. The mapping goal is to visually pull the focus toward the inner third of the eye to balance the facial proportions.
Wide-set eyes mapping strategy
- Curl: Emphasise the inner third — longer, slightly more lifted lashes near the tear duct.
- Length distribution: 9-10 mm at the inner corner (longer than usual), 11-12 mm middle, 10-11 mm outer.Keep the inner corner natural (7–8 mm), place the emphasis through the inner-middle section rather than the outer corner, and avoid dramatic cat-eye styling that pulls the eye outward.
- Style effect: Draws attention inward, creating the illusion of closer-set eyes.
- Avoid: Strong cat-eye styling — the outer emphasis makes wide-set eyes look even further apart.
Close-Set Eyes — Draw Attention Outward
Close-set eyes are less than one eye-width apart. The mapping goal is the opposite of wide-set — visually push the attention outward to create the illusion of more space between the eyes.
Close-set eyes mapping strategy
- Curl: Standard C or CC through inner and middle; strong D or L at the outer corner.
- Length distribution: Shorter at the inner corner (7-8 mm), medium middle (10-11 mm), significantly longer outer (13-14 mm).
- Style effect: Dramatic outer emphasis that visually widens the eye spacing.
Small Eyes vs Prominent Eyes
Two additional shape considerations that affect mapping regardless of the primary eye shape:
Small eyes
Small eyes benefit from mapping that adds density and lift without overpowering the eye. Choose D or CC curl (avoid excessive curl or excessive length that can overpower smaller eyes), stay in the 9-11 mm length range, and keep the diameter medium (0.05-0.07). Overdoing the length or diameter closes small eyes rather than opening them.
Prominent (protruding) eyes
Prominent eyes have more natural depth from the socket. Mapping should soften rather than accentuate — use C or CC curl, keep lengths modest (9-11 mm), and choose a soft volume rather than dramatic mega volume. The natural prominence carries the drama; the extensions just need to enhance.
Mismatched or Asymmetric Eyes
Facial asymmetry is universal — every client has slightly different eyes. When the difference is subtle (which it usually is), apply the same map to both eyes. When it's genuinely significant (one eye is noticeably more hooded, one sits lower than the other), map each eye individually to correct the asymmetry rather than accentuate it.
- One eye more hooded than the other: Use L or M on the hooded side, standard C or D on the other side.
- One eye more downturned: Stronger outer-corner lift (D or DD) on the downturned side.
- Uneven eye size: Slightly heavier density on the smaller eye to balance the visual weight.
Important: always mention any asymmetric mapping choices to the client before you start. Some clients want asymmetric mapping to correct the difference; others prefer their asymmetry preserved. Never assume — ask.
Common Mapping Mistakes
- Using the same map for every client. The single most common mistake. Every client is different — map every set.
- Extreme lengths through the middle on hooded eyes. The lashes disappear under the lid. Save the length for the outer third.
- Uniform curl across the whole lash line. Real lashes vary in direction and shape — extensions should follow that variation.
- Ignoring natural lash growth direction. Fighting the natural direction reduces retention and looks awkward.
- Forgetting to reassess at infill appointments. Natural lashes shed and regrow — the map should be adjusted at each infill.
- Not documenting the map. Photograph or note every client's map in your booking system for consistency across appointments.
- Copying a map from social media without considering the client's eye shape or natural lash health.
Tools and Products for Accurate Mapping
The right tools make consistent mapping much easier. Standard kit:
- Mixed-length lash trays across your working diameter — pick the length you need for each position without swapping trays. Champion Black Lashes range are available in a wide range of curls, lengths and diameters, making them ideal for customised mapping.
- Isolation tweezers with a fine, sharp tip — mapping precision depends on clean lash isolation. Browse the isolation tweezers collection.
- A mapping sticker or under-eye pad marked with the position numbers — reduces cognitive load during application.
- Good lighting — you can't map what you can't see clearly.
- A magnifying lamp or wearable magnification for detailed mapping work.
For the full diameter and length reference: read our Complete Diameter and Length Guide.
Frequently Asked Questions
What is lash mapping?
Lash mapping is the process of planning which curl, length, and diameter of extension goes where along each natural lash line before starting application. It's the technical foundation of every professional lash set.
How do you map lashes for hooded eyes?
Use L or M curl through the middle and outer third to clear the hooded lid. Keep lengths modest (9-11 mm through the middle) and reserve dramatic length for the outer corner where it's fully visible.
What's the best lash map for almond eyes?
A gentle cat-eye taper: C or CC through the middle, D at the outer corner, with lengths increasing from 7-8 mm inner to 12-13 mm outer. Almond eyes support most standard mapping approaches beautifully.
What's the best lash map for round eyes?
Emphasise the outer corner with strong D or L curl and dramatic outer length (13+ mm). This elongates the eye horizontally toward an almond ideal. Avoid uniform length distributions.
Should I use the same map on both eyes?
Usually yes, when the eyes are roughly symmetric. When there's significant asymmetry (one eye more hooded, or downturned), map each eye individually to correct the asymmetry — but always discuss this with your client first.
How do I learn advanced lash mapping?
Structured lash training is the fastest path. Posh Deluxe Lash Training covers mapping in depth across the Classic and Russian Volume courses. See our full guide to Best Lash Courses in Australia.
How often should I update my lash maps?
Reassess at every infill appointment. Natural lashes shed and regrow constantly, so the map that suited a client at their full set may need adjusting 3-4 weeks later. Document each client's current map in your booking system for consistency.
The Bottom Line
Advanced lash mapping is the difference between a set that's technically fine and a set that genuinely flatters. The more eye shapes you map, the better your instincts become. Every client teaches you something new, and that's what separates an experienced lash artist from someone who simply follows a template. Your retention numbers will improve because the lashes work with the natural direction; your client photos will improve because every set actually suits the face; and your rebooking rate will improve because clients notice the difference immediately. Browse the full Champion Lashes range for every curl and length you need to map any client, stock isolation tweezers for mapping precision, and see our training courses for hands-on advanced technique.


